
This DIY wizard wand bag tutorial is a life-saver when it comes to toting Harry Potter wizard wands around the Wizarding World of Harry Potter at Universal Studios (and beyond). Using simple sewing supplies and skills, you can create your own wizard wand backpack to secure the magical cargo.

DIY Harry Potter Wizard Wand Carrier
Nothing is cooler than getting a wizarding wand at Harry Potter land in Universal. What is NOT so magical is worrying about how you are going to carry the wand around while you walk around the park.
Here is how to make your very own Harry Potter themed Wand Bag!
DIY WAND BAG

Today we are making Harry Potter themed Wand Bags! The perfect way to carry your wizard wand where ever you go!
Related: Make your own DIY Harry Potter wand
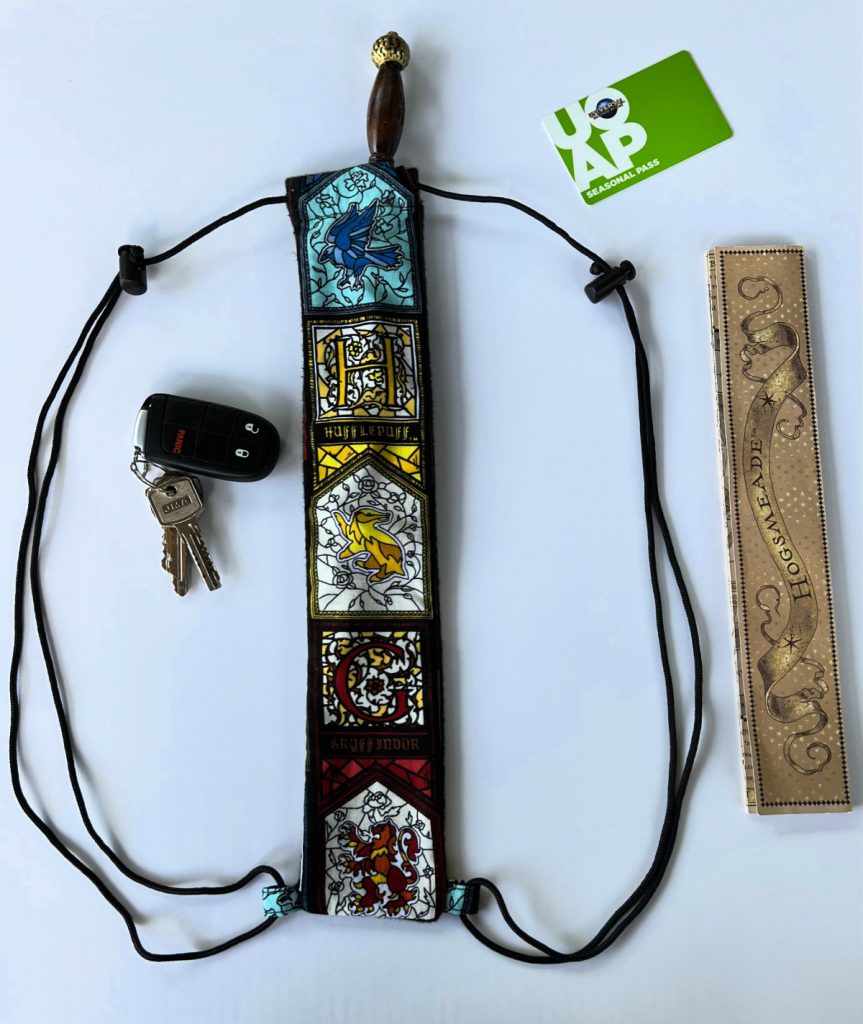
This is one of our favorite ideas to easily carry your Harry Potter Wand around at Universal Studios! This bag is perfectly sized to hold a wand and has a pocket in the back to hold the map as well.
This article contains affiliate links.
HOW TO MAKE A WAND BAG
Psst…if you would rather buy the wand bag (I get it) and you can find out where to get your own Harry Potter wizard wand bag <–here.
Supplies Needed to Make Harry Potter Wand Bag
- 1/4 yard of your favorite fabric Harry Potter themed fabric
- 1/4 yard of black felt fabric
- 2 ½ yards paracord
- 2 Oval Cord Locks
INSTRUCTIONS TO MAKE HARRY POTTER WAND BAG
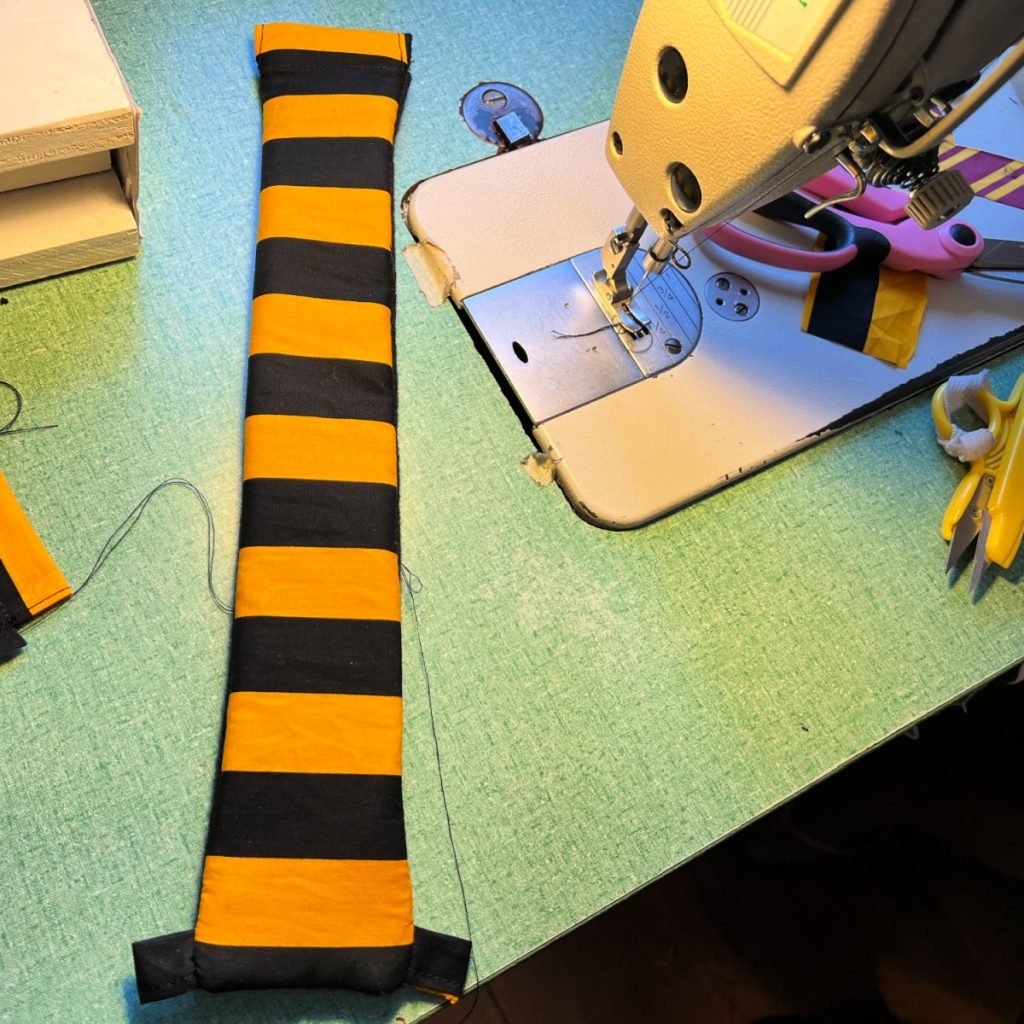
Step 1 – Prep your fabric

- Cut a piece of fabric for the front of the bag 16 ½” X 3”
- Cut a piece of felt fabric for the back of the bag 16 ½” X 3”
- Cut a piece of felt fabric for the back pocket 15 ½” X 3”
- Cut 2 pieces of fabric for the loops 2” X 1”
Step 2 – Create the Loops for Bottom of Bag
Fold the 2” X 1” fabric strips lengthwise with right sides together. Sew at ¼” seam allowance leaving bottom and tops open. Turn inside out, and iron so it makes a ribbon.
Step 3 – Sew a Casing for Top of Bag

- Cut a ¼” wide notch 1” from top of cotton fabric. Fold fabric down 1” inch and stitch to make a casing.
- Cut a ¼’ wide notch 1” from top of felt fabric. Fold fabric down 1” and stitch to make a casing.
Step 4 – Sew Bag & Ribbon Tabs

Take the ribbon pieces you made and fold in half. Position them at the bottom of the bag, on top of the cotton fabric, matching the raw edges.
Sew with right sides together, stopping at top notch you cut, where the casing is.
Turn right side out, pulling the ribbon ties to the outside.
Press to lay flat.
Step 5 – Add the Back Pocket to the Bag

- Fold top of pocket piece down 1” and stitch
- With right sides together, use overlock machine to stitch back pocket to the bag
- Turn right side out and press flat
Step 6 – Attach the Paracord

String paracord through front of bag, then through back of bag. Adjust string so that it is even on both sides.
Step 7 – Attach the Paracord Stopper

- String paracord through the cord stopper.
- Loop paracord through bottom ribbon loops, then back up through the cord stopper.
Step 8 – Tie & Finish Edge

Tie end of the cord into a knot to secure, and burn edge with a lighter to keep the cord from fraying.
WIZARD WAND BAGS YOU CAN BUY
Don’t have time to DIY wand bags?
Shop the selection at Wizardwandags.com! Whether you need a bag for 1 wand, or need a bag that hold multiple wands, they have the perfect size for you.
These bags are perfectly sized for your wand, and even hold the map, your ID, and keys. The larger bags even have space for your cell phone and sunglasses so you can be hands-free while you navigate the park.
Now THAT is magical!
MORE HARRY POTTER FUN FROM KIDS ACTIVITIES BLOG
- Make this yummy Harry Potter Butterbeer recipe!
- Or make HP pumpkin juice…yum!
- Host a magical party with these Harry Potter party ideas!
- These Harry Potter recipes are some of our favorites.
- Try your skills in the Harry Potter escape room from home!
- This Harry Potter spells list is a free printable book you can color or make into a Harry Potter spell book.
- Grab these Harry Potter stencils.
- Whip up a batch of these HP approved sorting hat cupcakes.
- And we love these free printable unofficial Harry Potter mythical creatures coloring pages.
- Check out the most magical wizard wand carriers!
Are you as excited about Harry Potter wizard wand bags as we are?


0