
Why make homemade playdough?
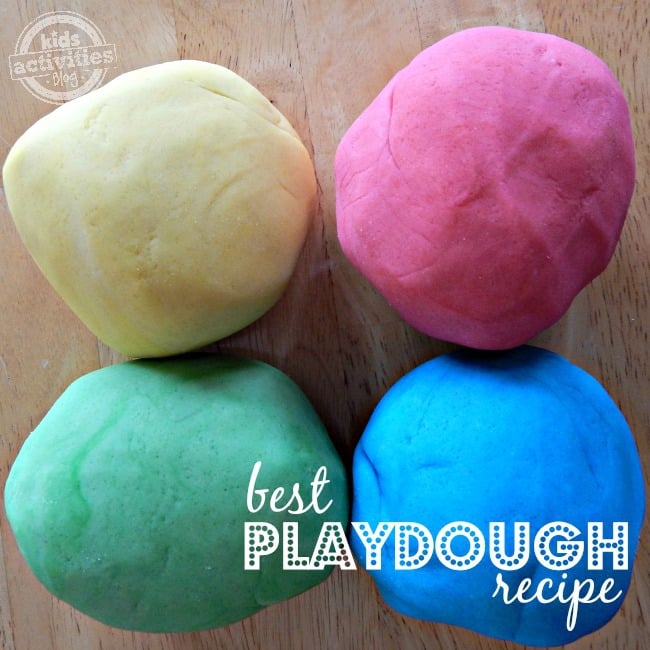
Play dough is the perfect rainy day activity, and we love making it in our kitchen. When you make your own playdough with the best playdough recipe ever, you get way more dough for your money than when you go out and buy it.
Plus, this homemade playdough is so much softer and easier to mold than the store-bought stuff!

Homemade Playdough
At Kids Activities Blog, we love making playdough and have several different recipes for you to try. This DIY playdough recipe has been around forever and there is good reason why it is a favorite recipe.
When I was teaching kindergarten, another preschool teacher passed it down to me as a “trade secret” but I didn’t think it was fair not to share (what I think is) the best homemade playdough recipe with you guys.
Oh, and it is an easy recipe! So, here it is!
This article contains affiliate links.
DIY Playdough Ingredients and Supplies
- 2 Cups of Flour
- 2 Tbsp of Oil (any oil will do, coconut oil, vegetable oil, even olive oil)
- 1/2 Cup of Salt
- 2 Tbsp Cream of Tartar
- 1 1/2 Cup Boiling Water
- Gel Food Coloring (Optional)
The secret to brilliant colors in your playdough is using gel food coloring – we find ours in the cake decorating sections of craft/hobby stores, or on the baking aisle in the grocery store. Gel food coloring is definitely the best dye for homemade playdough.

How to Make Playdough
- Let’s start with the dry ingredients. Pour 2 cups of flour into a large bowl.
- Add 1/2 cup of salt.
- Mix in 2 tbsp Cream of Tartar. (You can find this in the spice section of just about any grocery store.)
- Add 2 tbsp of oil. For this recipe I used vegetable oil, but you can use any oil, and as long as it’s a kitchen oil, your playdough will be non-toxic and safe if a little one takes a tiny taste. The sodium level is very high, so we don’t encourage this to double as a snack.
- Pour in the boiling hot water. Be VERY careful because this makes the dough HOT!
- Mix all the ingredients together until they form the dough. At this point, if you don’t want to add any drops of food dye to your playdough, you’re finished!
- After it’s cooled, to make several different colors of playdough, separate the dough into equal parts and roll it up into balls.
- Now, punch out the middle of the ball to leave a little bowl for you to pour your gel food dye into.
- Drip your gel dye into the bowls. This is a great time to mix dye colors if you want to make another color.
- Knead the dough until the dye is thoroughly mixed. This is VERY messy! If you don’t want to stain your hands with the sticky mess, use gloves, and make sure to put something down so you don’t stain your counter (like I did).
- Add your favorite playdough smells – extracts and essential oils that fit the colors you chose.

How do you keep food coloring from staining your skin?
When you are making homemade playdough with food coloring, there will be some color coming off the playdough onto kids hands during the process. Lighter colors will be less likely to stain. And the most chance for causing staining of the counter and hands is when initially mixing in the gel food dye.
We find that pastel colors will come off on kids hands at first, but after they play a time or two and it has been stored in an airtight container, the staining is minimal.
Bright, bold and intense colors will have more likelihood of staining even after several uses.
If you are concerned about artificial colors, check out our big list of natural food coloring alternatives.
Can this Playdough Recipe be made without Cream of Tartar?
Cream of tartar also known as potassium bitartrate is a common kitchen ingredient that is used to stabilize other ingredients in cooking due to its acidic qualities. In this homemade playdough recipe, cream of tartar helps create the springy and lightly rubbery texture that is so fun to play with.
If you don’t have any cream of tartar in the house, there are several good substitutions that work:
- 2 tablespoons of lemon juice along with a little more flour to offset the increase in liquid.
- 3 tablespoons of baking powder.
- In a pinch, you can substitute 2 tablespoons of vinegar, but I don’t like the smell of the resulting playdough for play.
Can this Playdough Recipe be made with Gluten Free Flour?
The easiest way to make this recipe gluten free is by using gluten free flour. Our favorite is King Arthur because it can be fully substituted in most recipes like this one with the same measurements and result with surprisingly similar consistency in the finished playdough recipe.
You can use other types of flour like rice flour, oat flour, or almond flour but the result will not be the same and you may find a need to add other ingredients to achieve the right consistency for play.
How to store Homemade Playdough
Store homemade play dough in an airtight container.
We noticed that our dough began to smell a bit sour after a month or two (which really is a long time!). Our solution: using Kool-Aid coloring (the flavor would mask the smell – but the colors weren’t as brilliant), or adding a few drops of candy extracts/oils.
My kids have enjoyed making peppermint or orange or cinnamon scented doughs! Have fun coming up with your own scent/color creations by adding drops of your favorite essential oils making it perfect for sensory play.
How to soften playdough if it drys out
My favorite way to soften any type of dried out playdough (even the store bought variety) is to dampen a paper towel completely and then wrap it around the playdough ball and put back in the airtight container for a bit or overnight.
If the playdough is really dried out, then running it under water and then kneading in the extra liquid will work but be messy at first!
The Only Play Dough Recipe You’ll Ever Need
We hope you will love this best recipe as much as we have. It is nice having homemade play dough recipe that you know is safe for your children and it is just fun to make together with your kids…even young children.
Not only is it great for crafts and activities (see more playdough activities below), but I always loved DIY Playdough, because it is squishier than store bought Play Doh, and that makes it useful for stress. It is also nice to have your own play dough – something customized with your favorite colors and smells.
Your child have a frustrating day? Squeezing playdough and vigorously squishing it is a great way to get out pent up frustration, plus I’ve been known to do it a time or two.
But tell us below, did you try this playdough recipe. If so, did you and your kiddos love it too?
Playdough Recipe

Learn how to make playdough with this easy playdough recipe. This homemade playdough is the squishiest, softest, and the best!
Materials
- 2 Cups of Flour
- 2 Tbsp of Oil (any oil will do, coconut oil, vegetable oil, even olive oil)
- 1/2 Cup of Salt
- 2 Tbsp Cream of Tartar
- 1 1/2 Cup Boiling Water
- Gel Food Coloring (Optional)
Instructions
- Pour 2 cups of flour into a bowl.
- Add 1/2 cup of salt.
- Mix in 2 tbsp Cream of Tartar. (You can find this in the spice section of just about any grocery store.)
- Add 2 tbsp of oil. For this recipe I used vegetable oil, but you can use any oil, and as long as it's a kitchen oil, your playdough will be non-toxic and safe if a little one takes a tiny taste. The sodium level is very high, so we don't encourage this to double as a snack.
- Pour in the boiling water. Be VERY careful because this makes the dough HOT!
- Mix all the ingredients together until they form the dough. At this point, if you don't want to add any food dye to your playdough, you're finished!
- After it's cooled, to make several different colors of playdough, separate the dough into equal parts and roll it up into balls.
- Now, punch out the middle of the ball to leave a little bowl for you to pour your gel food dye into.
- Drip your gel dye into the bowls. This is a great time to mix dye colors if you want to make another color.
- Knead the dough until the dye is thoroughly mixed. This is VERY messy! If you don't want to stain your hands, use gloves, and make sure to put something down so you don't stain your counter (like I did).
Notes
We noticed that our dough began to smell a bit sour after a month or two. Our solution: using Kool-Aid coloring (the flavor would mask the smell - but the colors weren't as brilliant), or adding a few drops of candy extracts/oils.
My kids have enjoyed making peppermint or orange or cinnamon scented doughs! Have fun coming up with your own scent/color creations.

More Playdough Recipes, Activities & Fun from Kids Activities Blog
What did you think of our favorite homemade playdough recipe?


Who knew you could make play dough at home!? Lol, not this mama…. til I saw your post. I had to try it and it worked beautifully. This playdough recipe is now printed and on my refrigerator for regular use!
I like the scent in your playdough recipe. Maybe my kids won’t eat it! LOL
I didn’t know how to make playdough when my kids were younger. I want a re-do. This looks fun. LOL
Making a homemade playdough recipe is the best way to make (inexpensive) memories with your kids! It’s also a math lesson (measuring), a STEM lesson, AND an art project, while working on fine motor skills!
Half the fun of playing with playdough is in the making of it! This is the best homemade playdough recipe!